Create a New Campaign
To create a new PUSH notification campaign, click on the plus icon under the "Ongoing and upcoming PUSH campaigns" tab.

An "Campaign parameters setup" form will appear.

Fill out the name of your campaign.

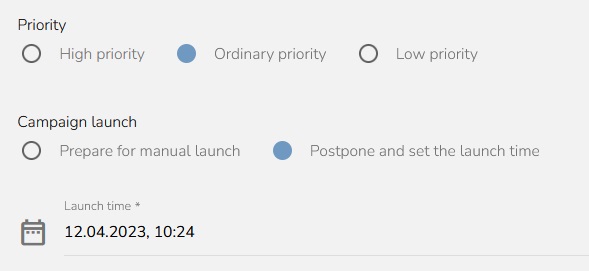
Set the priority of your campaign and how and when the campaign will be launched. "Prepare for manual launch" means that you can start the campaign manually whenever you want. "Postpone and set launch time" means that you can set the date and time of the launch, and the campaign will be launched automatically at that time.

Set whether you want to optimize email sending time according to customer preferences. Due to optimization, the campaign can take up to 24 hours to be sent.

Set whether the campaign is a test campaign or not. Set the Test Campaign option if you don't need to track campaign results in Analysis & Reporting.

Set the number of days to track the campaign results — how long you want the purchase in store to be connected to the campaign and also how long the reports will be updated.

Choose which products will be promoted. Let's say you design an email and there will be 5 products and you want to track individually one of the products. Set this product into Promoted products. Then in the Analysis & Reporting app you will have an individual widget. It contains information about the number of customers who bought any of the promoted products, the number of purchases, and each product's sales revenue. You also have the option insert a .csv file with products. The file doesn't contain the header. The external_id is in the first column, and the listCode of the particular product list (if you don't use GLOBAL) is in the second column. The delimiter is a semicolon.

Select an audience to be targeted by this campaign.

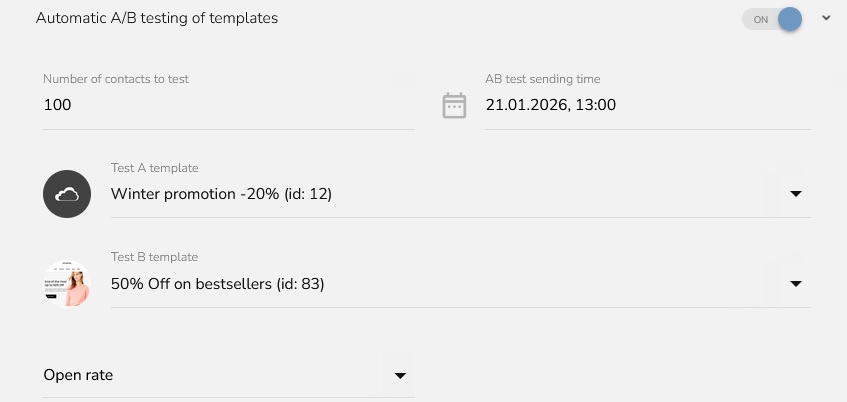
If you want AB testing, turn on that option.
Choose a number of contacts to test, set AB test sending time, Test A template, Test B template and choose a metric. You can find more about AB testing here.

Select the template for this campaign.

Choose a language version. This is useful if you have customers who speak different languages. For example, if you have customers in Slovakia, Poland and Austria, you can send campaigns to each country in their language.
Set which languages you want to use in the Loyalty & Administration, and then design templates in each language in the Campaigns & Audiences app.

Set the "Campaign tag setup".

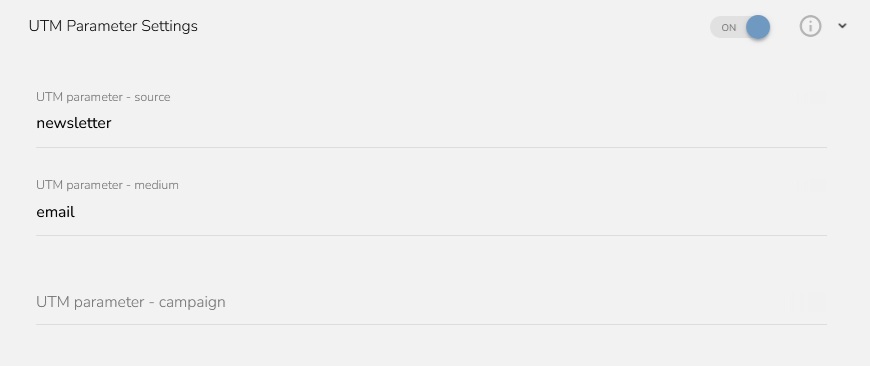
Set the UTM parameters according to your preferences.
UTM parameter - source is the source of the click through and is set to "newsletter" by default.
UTM parameter - medium indicates the marketing channel and is set to "email" by default.
UTM parameter - campaign identifies the campaign. If you do not fill in the field with your own identification, it will be automatically generated in the format: campaign-[campaign ID]-[campaign name]-[creation date in the format:YYYY-MM-DD]-[language] as in example: campaign-5-winter-sale-2025-12-24-en

Save it by clicking on the button "Save Campaign".
