Customer Application Guide
Not enough resources or time to develop your own customer-facing app? Take advantage of the out-of-the-box CareCloud Customer App! Customers can view their profile, vouchers, order history, membership level, points collected, etc. Also, customers can purchase or redeem their benefits in this app, making your loyalty program fully digital!
For your convenience, the Customer Application is developed on the most widespread platform - WordPress. You can receive WordPress for free here or from any hosting provider as a premade solution.
You need to have a fully functional WordPress installation with admin rights to be able to follow all steps below.
We recommend following the order of steps to avoid any issues during the deployment.
1. Plugin Installation to WordPress
The first step is plugin installation to WordPress. Download the installation .zip file.
1.1. Sign in to WordPress administration and navigate to "Plugins > Add New"
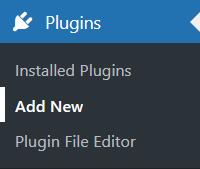
1.2. Click on "Upload Plugin" next to the headline and choose a ".zip file" you downloaded from the CareCloud platform.

1.3. Activate the plugin after installation by clicking on "Activate Plugin".

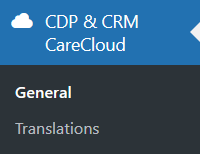
When plugin installation finishes, a new tab appears in the menu: CDP & CRM CareCloud. There, you activate the API interface and manage the app setup.
2. API Interface Activation
You need to generate an External Application ID in the administration of your CareCloud platform to connect the Customer app.
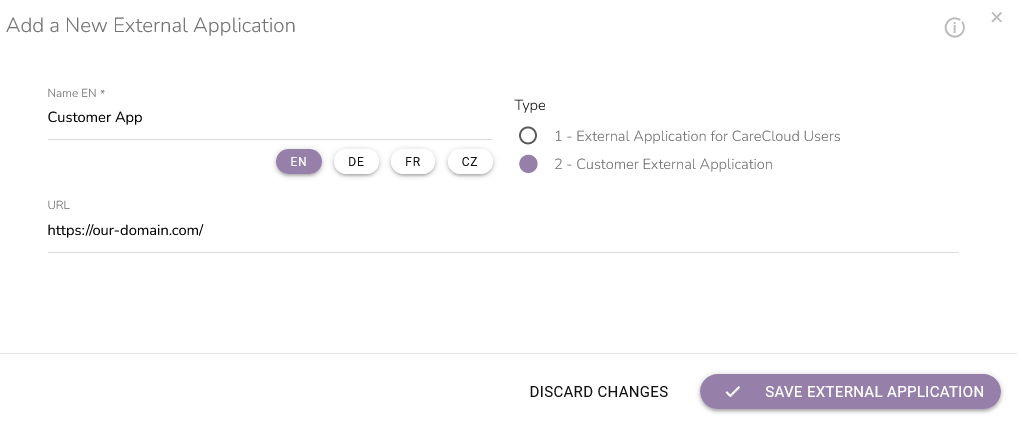
2.1. Enter the CareCloud platform and navigate to "Administration > System configuration > External Applications" and click on the Add new icon.
2.2. Fill out the application’s name in a modal window and choose “2 — Customer External Application”. Fill in the URL of your website for easier application identification. Save the external application.
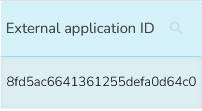
2.3. New line with the external app is added to the table. Copy the value from the “External application ID” column.
2.4. In the menu of WordPress administration, enter the CDP & CRM CareCloud tab. Fill out the URL to CareCloud API in this format:
PROJECTURL/webservice/rest-api/customer-interface/v1.0/
Example:
https://demo-client.crmcarecloud.com/webservice/rest-api/customer-interface/v1.0/
2.5. Insert external ID generated in the CareCloud platform in the External application ID field.
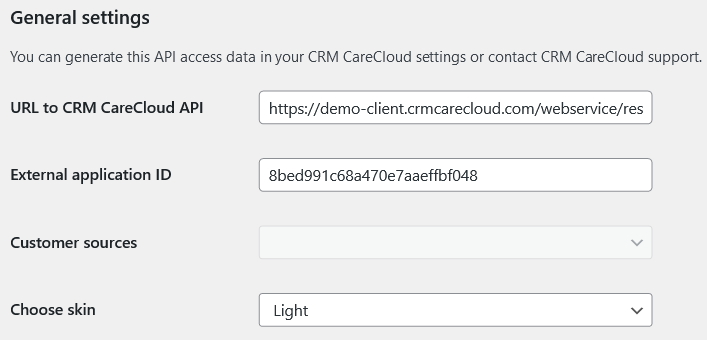
2.6. Save changes with the "Save Changes" button.
You can verify that API interface activation was successful using the Customer Sources field. Before API activation, the field is blank and inactive. After successful activation, the field becomes active and lets you choose from the Customer Sources you have set up in CDP & CRM CareCloud platform.
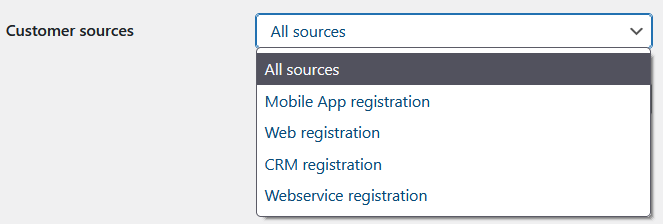
3. Login and Profile Pages Preparation
You need at least two new pages in WordPress for Customer app operation — "a login page" (login form) and the "profile page" of the customer app (where the customer is redirected after login). Create two blank pages using WordPress administration.
You will insert the CareCloud components into relevant pages using "shortcodes". We recommend inserting the shortcodes into a paragraph module, but you can use any text field.
3.1. Edit the login page, and insert the following shortcode: [carecloud-customer-login-form]
3.2. Connect the login page in customer app administration and save changes.
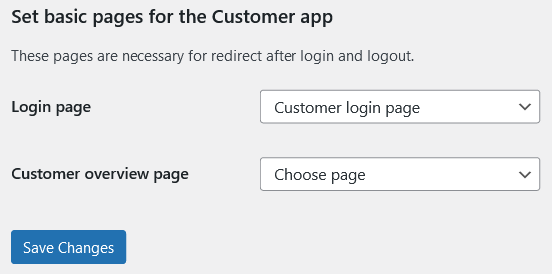
3.3. Click on Login test customer in the CDP&CRM CareCloud plugin administration.
"Attention!" The following steps can be made only after logging in.
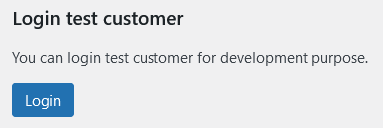
3.4. Edit the profile page and insert "one" component from Components using a shortcode. This page will be displayed to customers after logging in. We recommend using the following shortcode [carecloud-customer-component component="Profile"].
3.5. Link the newly created customer app page in the administration of the Customer app and save changes.
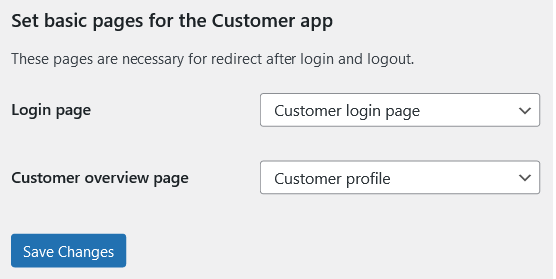
You can check the proper setup in the following way. If you try to open (as a visitor) the login page while being logged in, you should be redirected to the profile page. Similarly, if you try to open the profile page, while being logged off, you should be redirected to the login page.
3.6. Create any number of additional WordPress pages and fill each with one component from the Components section.
"Attention!" Insert only one component per WordPress page. Inserting more components on one page may lead to performance issues and component malfunctions.
(optional 3.7.) If you wish to use some shortcodes directly in the menu, it is possible with third-party plugins such as Shortcode in menus.
Insert the following shortcode [carecloud-customer-menu-items] as a menu item.
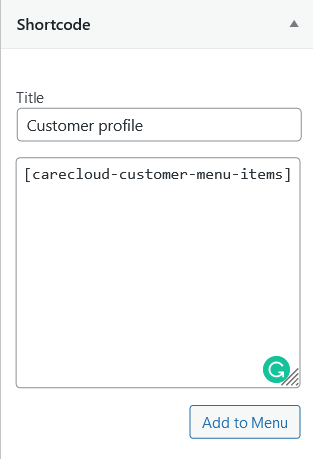
Then insert all pages containing the components as sub-pages in the menu. This handles the dynamic displaying of menu items based on whether a customer logged in.
.png)
Shortcode also allows you to insert the log-out option into the menu.
.png)
This item’s submenu is available after login. Fill the submenu with the created pages with components.
3.8. Use the Custom Link to create a link for logging out in URL [carecloud-customer-logout-link]. You can make this link as an item in the menu or a button of your choice.
4. Components
You find a list of available plugin components below. Use components by inserting a relevant shortcode.
Pages with External Components can be created only when logged off.
External Components
| Component Name | Component Shortcode |
|---|---|
| Login Form | [carecloud-customer-login-form] |
| Registration Form | [carecloud-customer-registration-form] |
| Password Recovery | [carecloud-customer-component-no-login component="Recovery"] |
Pages with Internal Components can be created only after logging in.
Internal Components
| Component Name | Component Shortcode |
|---|---|
| Address | [carecloud-customer-component component="Address"] |
| Personal Data | [carecloud-customer-component component="Profile"] |
| Update | [carecloud-customer-component component="Update"] |
| Password Change | [carecloud-customer-component component="Password"] |
| Cards | [carecloud-customer-component component="Cards"] |
| Purchases | [carecloud-customer-component component="Purchases"] |
| Rewards | [carecloud-customer-component component="Rewards"] |
| Vouchers | [carecloud-customer-component component="Vouchers"] |
| Dashboard | [carecloud-customer-component component="Dashboard"] |
| Timeline | [carecloud-customer-component component="Timeline"] |
| Wallet | [carecloud-customer-component component="Wallet"] |
| Logout | [carecloud-customer-logout-link] |
5. Login Form Design
Individual components of the login form are tagged with CSS classes. You may design them in whichever way you prefer with CSS within your standard editor.
6. Custom Captions and Texts
Captions, your own texts, placeholders, and error messages can be customized in Customer app administration in the Translation tab.

7. Customer App DEMO
The Customer app DEMO can be found here.
Request the login details from your sales representative.