Onboarding 02: Drip Campaign
Key Metric: Drop in number of accounts without a purchase
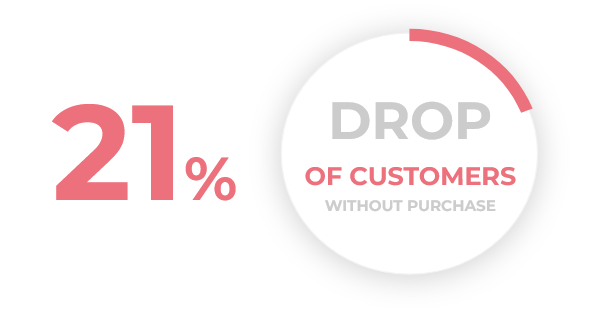
Average Result: 21 %

Metric Detail: The number of customers who make a repeated purchase during the workflow processing increases from 25% to 46%, representing an average drop in the number of customers with additional purchases by 21%.
Workflow Detail: Don’t try to extract money from new customers right after their registration. Use this campaign to properly introduce your brand, product use cases, and benefits. This alone is often enough to convince customers about your product. For the really stubborn customers, there is a voucher incentive at the end of the workflow to help them decide about the next purchase.
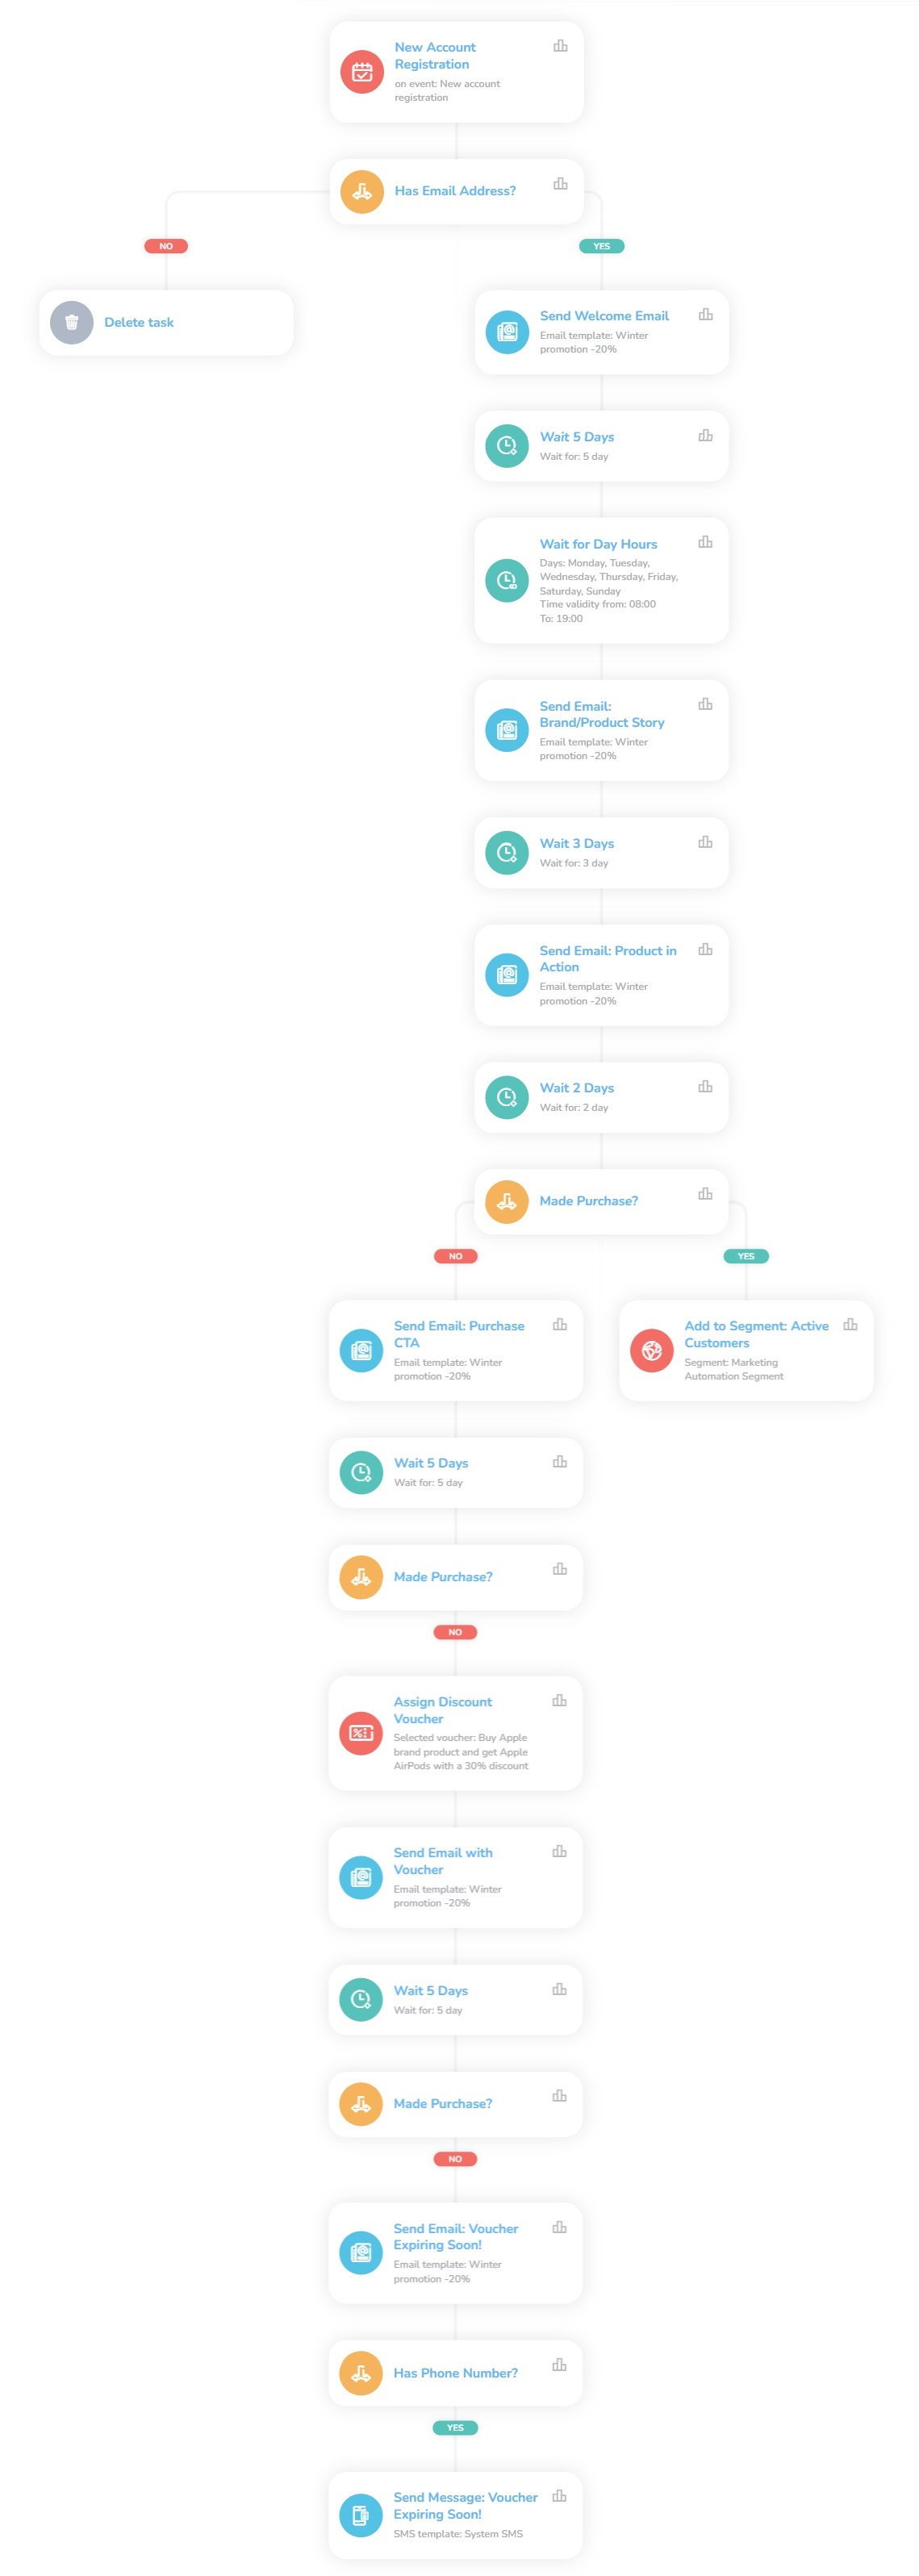
Workflow Preview:

See the details of this workflow in CareCloud Platform Demo here or ask for your access details.
Step by step description
Below is a detailed description of each node with an explanation if necessary.
Trigger
This workflow is triggered with the external "New account registration" event, which means the workflow automatically begins every time a customer registers a new account.


First Condition
Since sending emails is free, we set a "Condition" node to check if the customer registers the email address. For the Customer matching attribute, choose email from the dropdown, and Select the option — Is set. For customers that didn't enter the email, this workflow ends. Otherwise, we send an email.
Note: Emails and SMS have to be designed before in the Campaign & Audiences App.


Waiting Nodes
Here comes the part where we send emails just with a piece of information. We need to set three "Waiting" nodes, all with a different number of days, and "Send email" nodes.
Choose a "Waiting" node and set the days you want to wait before another email is sent. In this case, it's five days.

We set a "Waiting for time range" node to ensure we will send an email at the right time. Choose the days and the time the email can be sent. Here it's every day, from 8 am to 7 pm.

Send another email with different information than before. Set another "Waiting" node, but this time choose a different number of days and send another email with another information. Finally, we set the last "Waiting" node in this part - this time just for two days.

Made a Purchase?
Now it´s time to send the customer an email offer, but first, we don´t want to send him a product offer he has already bought. So we check if the customer made a purchase. Choose a condition and set add event type condition; then, for event type, choose from the dropdown new purchase and add an attribute.

The system assigns the customer that has already purchased a segment you choose. Set "Add customer into a segment" node and the segment type from the dropdown.

We sent an email to customers who have yet to make a purchase. We want to give them time to purchase, so we set a "Waiting" node for five days.

Set a condition like before to check if the customer made a purchase. Made a purchase, the workflow ends. If not, we will move forward. Assign a voucher to the customer, send it via email, and wait another five days.
Note: The voucher has to be designed first in Loyalty & Administration App.

Last Interaction
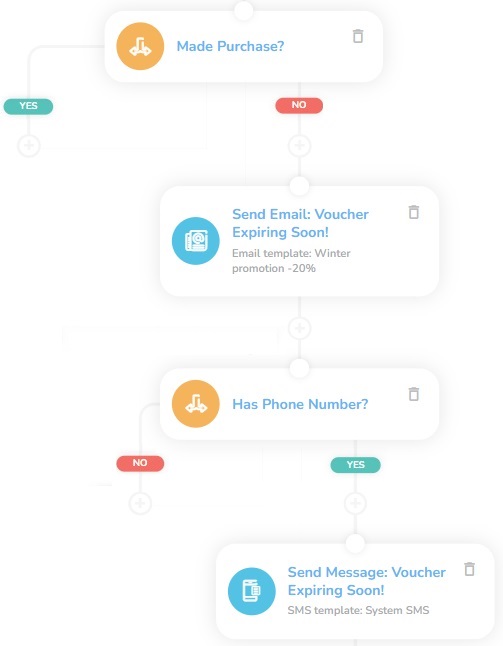
Here comes the last condition that checks if the customer made a purchase. Still waiting; we sent an email that said the voucher would expire soon and set the condition to check if the customer entered the phone number. If not, the workflow ends. If yes, we send a message, about the expiring voucher, through the phone.
