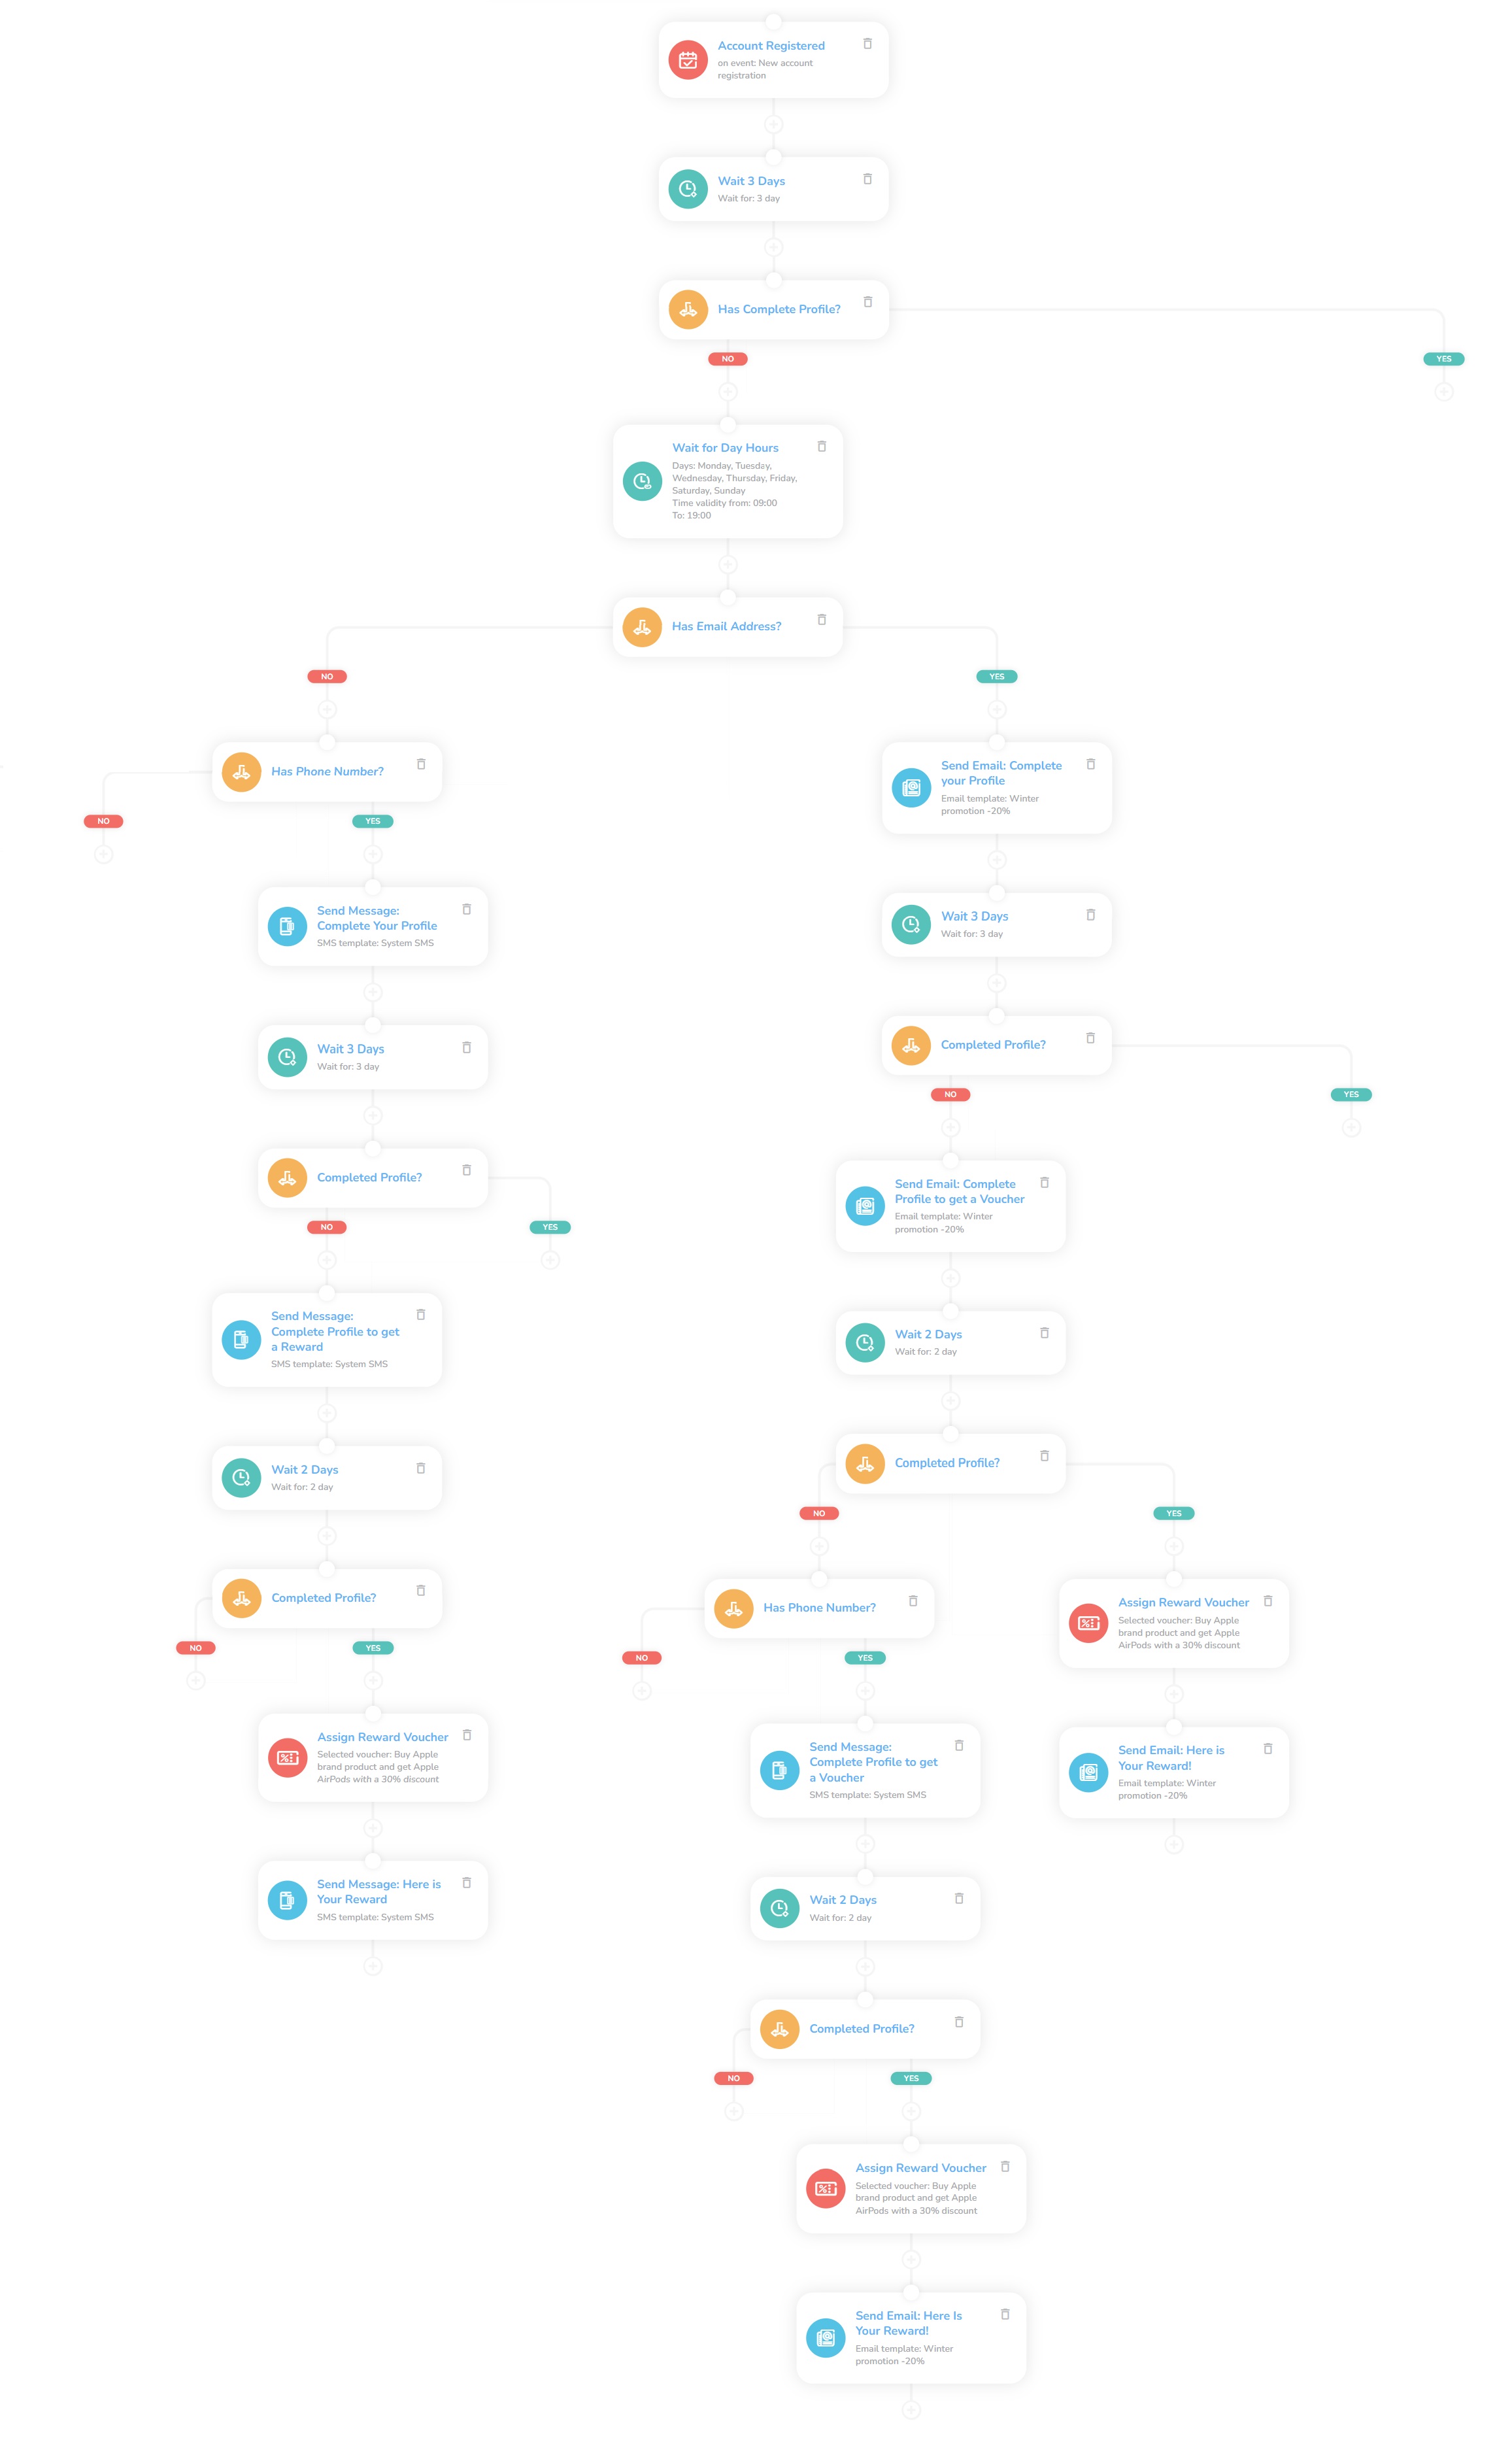
Onboarding 01: Data Collection with a Voucher Incentive
Key Metric: Customer accounts with all optional data
Average Result: 2.2x more

Metric Detail: The number of customer accounts that have all optional data filled in increases from 18% to 40% after the deployment of the workflow, thus increasing more than 2.2 times on average.
Workflow Detail: Registration should be brief and simple, but you want as much data about new customers as possible. Use this workflow to collect all the missing data about a customer after their registration. This workflow incentivizes hesitant customers with a voucher to share their data. You can significantly influence the result by the attractiveness of the customer benefit.
Workflow Preview:

See the details of this workflow in CareCloud Platform Demo here or ask for your access details.
Step by Step Description
Below is a detailed description of each node with an explanation if necessary.
Trigger
This workflow is triggered with an external Account Registered event, which means that every time a new customer registers a new account, this workflow begins. For customers that filled out the profile, the workflow ends. Set a "Waiting" node for three days to give a new customer time to complete his profile.


Now it´s time to set the first condition to check if the customer has a completed profile. Choose a "Condition" node and select attributes the customer should follow. In this case, there are five matching attributes - first name, last name, email, phone number, and date of birth. You can select any attribute you prefer. For customers that have filled the account, this workflow ends.
Note: This workflow has three conditions node that checks the completed profile. We set the same matching attributes for all of them.


We set the "Waiting for time range" node to ensure the system will send an email at the right time and choose days and hours. Here we set every day from 9 am to 9 pm.

Set a type of communication
Since sending an email is free, we check if the customer entered the email address. We add Customer property condition and choose email, and select Is set. If we don´t have the email, we try the phone number.
Note: The email and SMS workflow is identical.

Send an email to a customer that tells them to complete their account and set another "Waiting" node to give the customer some time. In this case, we set three days.

Note: You have to first design an email or SMS in the Campaign and Segmentation App

Check if the customer has already completed the profile. If yes, the workflow ends. If not, we will move forward and send them another email. This time we inform them they will get a voucher if they complete the profile.

Voucher assign
Wait for two days and check if the profile is completed. If yes, we will send them a reward voucher. Set the "Assign Campaign voucher" node, choose a voucher design from the dropdown, and send it via email.
Note: You have to design the voucher first in Loyalty Engine App

But if the account still needed to be completed, we checked the phone number.

We have a phone number, so we send a message with information about getting a voucher and wait for two days.
Last interaction
Here comes the last condition to check the profile. Once the profile is completed, we assign the voucher, choose the design from the dropdown, and send it via the phone number.
